
It seems that the latest nail craze is "caviar" or "fish egg" manicures so I decided to hop on the bandwagon and try it out for myself. Personally, I dislike referring to this nail design as Caviar or fish eggs so I like calling them "Fairy Bread" or "100s and 1000s" manicures, explaining the photograph below. This nail craze is based on the Ciate manicure sets which happen to cost as extravagant as they sound! Fortunately, there is another way to achieve this on trend nail look and it isn't going to break the bank! This is a tutorial on a Caviar accent nail because doing all of my nails this way feels like a bit much for me but if you like the look then you can go ahead and repeat the process I show you for all of your nails.

This cheaper alternative requires the replacement of Ciate beads with micro beads from eBay or any craft stores. You can definitely find these little beads in craftware stores but I find that you can purchase them off eBay at a more affordable price! Choosing the right beads is really important because if they are too large it won't work and you need to make sure you have all the colours you desire to achieve the look your going for. You can click here to purchase the bead wheel I am using for this tutorial as they are a perfect size and come with many different colours.

This blue caviar accent nail emphasizes the gorgeous blue polish without overpowering it.
YOU WILL NEED:
* Base coat
* Blue nail polish
* Blue micro beads
* Strong top coat

STEP 1
POLISH
Apply a base coat to clean buffed nails to help create a perfectly smooth surface for you polish to glide onto. Next apply your first coat of your blue polish, don't worry about being messy or uneven because the beads will cover up these imperfections. Since we are only placing beads on an accent nail, make sure all your other nails are neat though.
STEP 2
BEADING
Find a cap of some sort which is deep and has curved edges to place your blue beads in. Apply your second coat of blue polish heavily on your accent nail. Tilting your cap with beads in it to the side, roll your sticky fingernail into the beads, collecting as many as possible onto your nail. Once your complete nail is covered in micro beads, take a flat eyeshadow brush and use it to gently press the beads into place and further into the polish.
STEP 3
SEAL
This is a super important step in ensuring that your Caviar manicure is long lasting. Make sure you use your favourite top coat to drown the beads! Without this step your beads will fall off within a day but with this step, the beads will be sealed in by the top coat and won't go anywhere for at least 5-7 days.
STEP 4
LEFTOVERS
The unused beads can be placed back into your bead wheel and saved for another time or if there isn't enough beads left for another time, they can be put towards mixing bead colours for rainbow Caviar nails.


This purple and black caviar accent nail brings some edge to the duo chrome purple polish without looking tacky.
YOU WILL NEED:
* Base coat
* Purple nail polish
* Purple micro beads
* Black micro beads
* Strong top coat
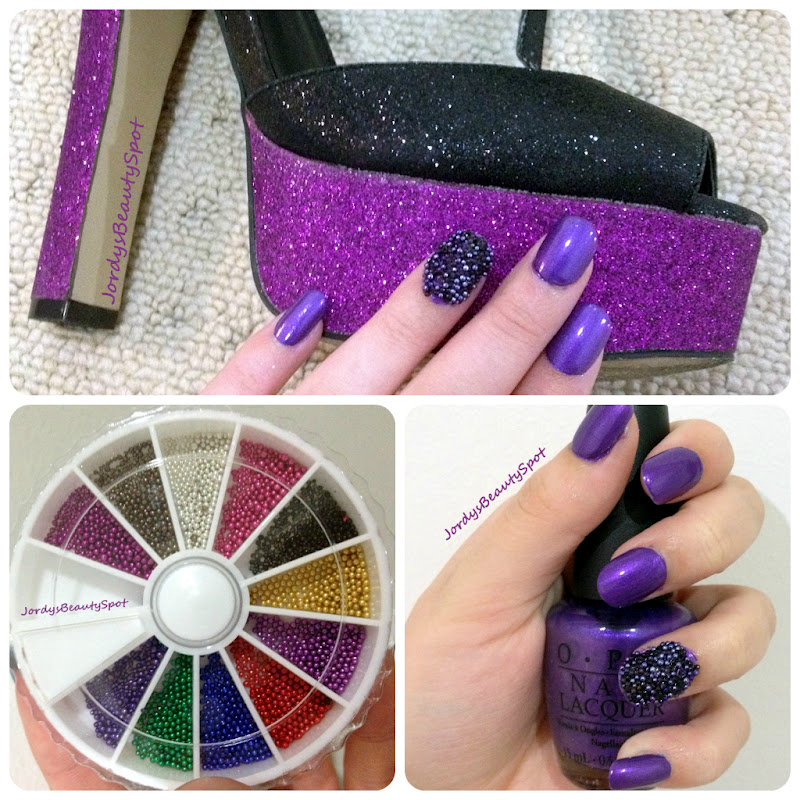
Follow the exact same procedure as used above for the blue nail tutorial but instead of only using one colour of beads, we will be mixing two different colours.
MIXING BEADS
Place half of the dark purple beads and half of the black beads into your cap and mix them up. Make sure that they are evenly proportioned and mixed well so that there is the same amount of purple beads as black beads on your nail.

The result is fashionable nails which don't cost you more than a pack of gum! Perfect for a dressy occasion and by doing your own cheap nails, allows you to spend more money on your hair or makeup.

4 comments:
These are fab! Love them :) x
@misseblog
Thank you :) xx
lovely! great tutorial, i'm trying this soon
I love the colour of the nails and the bead feature, I wish opi colorurs were cheaper here in aus though!
Post a Comment